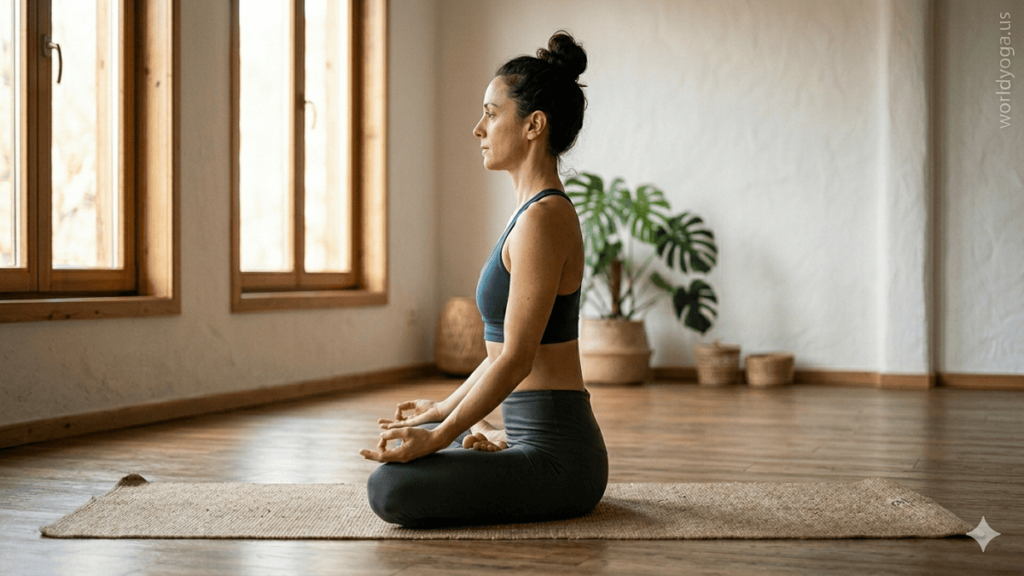
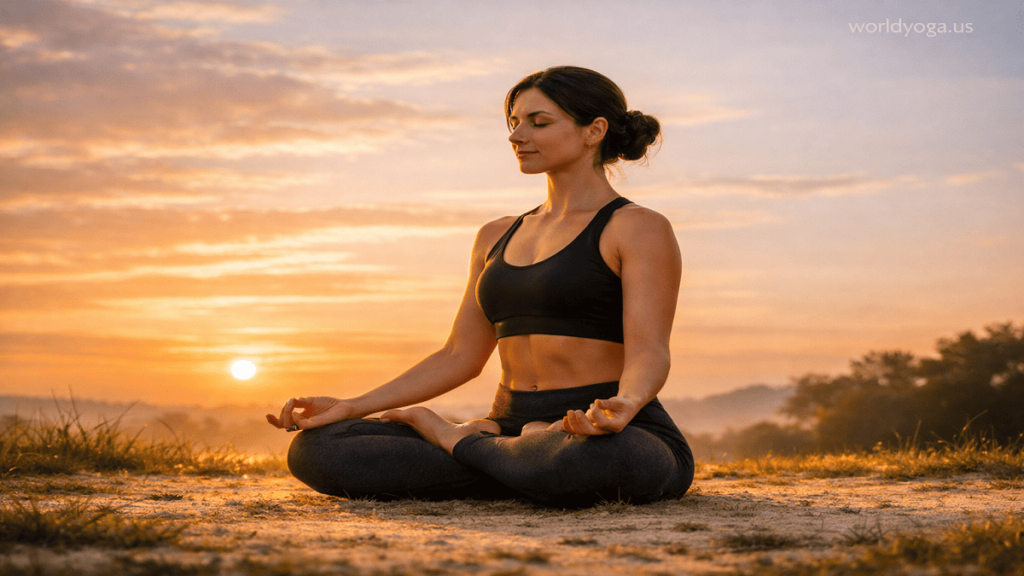
Knee to the Floor: Lotus Pose.
Knee to the Floor: Lotus Pose refers to a refined and grounded expression of Padmasana, where the practitioner emphasizes deep hip opening and stability by guiding the knees closer to or in contact with the floor. This variation highlights flexibility, नियंत्रण (control), and proper joint alignment, making it a significant posture in both meditative and physical yoga practices.
In this pose, the practitioner begins in a seated position and gradually brings each foot onto the opposite thigh, forming the classic Lotus configuration. The defining aspect of this variation is the intentional lowering of the knees toward the ground, which reflects advanced external rotation in the hips rather than forceful الضغط (pressure) on the knees. Proper execution ensures that the movement originates from the hip joints, protecting the knees from strain.
From a biomechanical perspective, Knee to the Floor in Padmasana requires significant flexibility in the hip external rotators, including muscles such as the piriformis and gluteal group. The knees act as passive joints in this posture and should not bear excessive force. The spine remains upright and elongated, supported by core engagement, while the shoulders stay relaxed to facilitate a stable and शांत seated position.
One of the primary benefits of this posture is enhanced hip mobility and joint स्वास्थ्य (health). It also promotes बेहतर posture by encouraging spinal alignment and स्थिरता (stability). Traditionally, Lotus Pose is used for meditation and pranayama practices, as it provides a balanced and grounded base that supports prolonged sitting with minimal muscular effort.
However, this variation requires caution. Forcing the knees to touch the floor without adequate hip flexibility can lead to injury, Knee to the Floor, particularly in the knee ligaments. Practitioners should approach the pose gradually, using preparatory hip-opening exercises and modifications such as half-lotus or supported बैठना (seated) positions.
In modern yoga practice, Knee to the Floor: Lotus Pose is often seen as a marker of advanced flexibility and control. It reflects not only physical capability but also patience and mindful progression. When practiced correctly, Knee to the Floor it offers both physical benefits and a deeper sense of mental focus and स्थिरता, aligning with the traditional purpose of Padmasana in meditative disciplines.
#Knee to the Floor: Lotus Pose in Maharashtra
How is Knee to the Floor in Lotus Pose performed correctly?
1. Starting Position
Begin seated on the floor in a comfortable cross-legged position. Keep the spine upright, shoulders relaxed, and pelvis neutral. Sitting on a folded blanket or cushion can help elevate the hips and reduce strain, especially if hip mobility is limited.
2. Entering Lotus Pose (Padmasana)
Bring one foot onto the opposite thigh, placing it close to the hip crease with the sole facing upward. Then gently bring the other foot onto the opposite thigh in the same manner. Both knees will move toward the floor naturally as the hips externally rotate. Avoid forcing the legs into position; the movement must originate from the hips, not the knees.
3. Aligning the Knees Toward the Floor
In the “knee to the floor” aspect of Padmasana, the goal is to allow the knees to descend closer to or rest on the floor through natural flexibility. The thighs should rotate outward, Knee to the Floor and the knees should lower gradually without pressure. If the knees remain elevated, allow them to stay supported—never push them down manually.
4. Spinal and Pelvic Alignment
Maintain a लंबा (elongated) spine with the crown of the head lifting upward. The pelvis should be slightly tilted forward to support the natural curve of the lower back. Avoid slouching or leaning backward, as this reduces stability and increases strain on the joints.
5. Hand Placement and Upper Body
Rest the hands on the knees or thighs, palms facing upward or in a मुद्रा (gesture) such as Chin Mudra. Shoulders remain relaxed, and the chest stays open, supporting steady breathing and mental focus.
6. Breathing and Holding the Pose
Practice धीमी (slow), controlled breathing. Inhale to lengthen the spine; exhale to relax the hips and allow the knees to release naturally toward the floor. Hold the posture comfortably for several breaths or longer if used for meditation.
7. Exiting the Pose Safely
To release, gently remove one foot at a time and return to a neutral seated position. Straighten the legs and lightly shake or stretch them to relieve any tension.
Common Mistakes to Avoid
Avoid forcing the knees downward, rounding the spine, Knee to the Floor or placing the feet incorrectly on the thighs. These errors can lead to knee strain or joint injury. Always prioritize hip flexibility over achieving the full visual form.
Conclusion
Knee to the Floor in Padmasana is achieved through gradual progression and mindful practice. With proper alignment and patience, it provides a stable and comfortable seated posture ideal for meditation and advanced yoga practice.
#Knee to the Floor: Lotus Pose in Delhi
What is the proper alignment in this variation?
1. Foundation: Hips and Sitting Base
The alignment begins at the pelvis. Sit evenly on both sitting bones (ischial tuberosities), ensuring balanced weight distribution. If the hips are tight and the knees lift significantly, elevate the pelvis with a folded blanket or cushion. This helps create a slight forward tilt of the pelvis, allowing the knees to descend naturally.
2. Leg and Knee Positioning
Each foot should rest securely on the opposite thigh, close to the hip crease, with the soles facing upward. The ankles should remain neutral—not sickling or collapsing inward. The knees should move toward the floor gradually as a result of hip external rotation. In this variation, the “knee to the floor” aspect is achieved passively; the knees should never be pushed or forced down.
3. Hip Rotation and Joint Safety
The hips must externally rotate to accommodate the leg position. This rotation is the key to lowering the knees safely. The knees themselves are hinge joints and should not تحمل (bear) rotational stress. Proper alignment ensures that any movement toward the floor comes from the hips, protecting the knee ligaments.
4. Spine and Torso Alignment
Maintain a लंबा (elongated) and upright spine. The natural curves of the spine should be preserved, with a slight inward curve in the lower back. The chest should be gently lifted, and the ribcage aligned over the pelvis. Avoid slouching or leaning backward, as this disrupts balance and reduces the effectiveness of the pose.
5. Shoulders and Upper Body
The shoulders should remain relaxed and drawn slightly back and down. The arms can rest comfortably on the knees or thighs. This positioning helps open the chest and supports calm, steady breathing.
6. Head and Neck Position
Keep the head aligned with the spine, with the chin parallel to the floor. The gaze can be soft and forward or slightly downward, depending on whether the pose is used for meditation.
7. Breathing and Stability
Slow, controlled breathing is integral to maintaining alignment. Each inhalation lengthens the spine, while each exhalation encourages the hips to release, allowing the knees to gradually move closer to the floor without force.
Common Alignment Errors to Avoid
Avoid forcing the knees down, rounding the lower back, or placing the feet too far from the hip crease. These mistakes can lead to discomfort or injury, particularly in the knees.
#Knee to the Floor: Lotus Pose in Pune
Which muscles and joints are involved in the pose?
1. Primary Joints Involved
Hip Joints
The hips are the most critical joints in this posture. They perform external rotation, flexion, and abduction, allowing the thighs to open outward and the knees to descend toward the floor. Adequate hip mobility is essential to prevent strain on other joints.
Knee Joints
The knees act as hinge joints in this pose. Ideally, they remain passive and simply follow the movement created by the hips. Any attempt to force the knees downward can lead to तनाव (strain) or injury, particularly to ligaments such as the meniscus or ACL.
Ankle Joints
The ankles are placed in a flexed and slightly rotated position as the feet rest on the opposite thighs. Proper alignment ensures that the ankles are supported and not compressed.
Sacroiliac Joint (SI Joint)
This joint helps stabilize the pelvis and supports the upright seated posture. Balanced alignment prevents asymmetrical pressure on the lower back.
2. Key Muscles Involved
Hip External Rotators
Muscles such as the piriformis, gemelli, and obturator group are heavily engaged to rotate the thighs outward. These muscles play a central role in achieving the “knee to the floor” position safely.
Gluteal Muscles
The gluteus maximus and medius assist in stabilizing the hips and maintaining alignment. They also support the outward rotation of the thighs.
Adductors (Inner Thighs)
Although stretched, the adductor muscles help maintain control and balance in the leg position, preventing excessive movement.
Quadriceps
The quadriceps stabilize the knee joint and help maintain the position of the legs without सक्रिय (active) strain.
Core Muscles
The abdominal muscles, including the transverse abdominis and rectus abdominis, support an upright spine and prevent slouching. They contribute to overall स्थिरता (stability) in the posture.
Spinal Extensors
The erector spinae muscles keep the spine लंबा (elongated) and upright, which is essential for both comfort and proper alignment.
Lower Leg and Foot Muscles
These muscles provide subtle stabilization for the ankles and feet, ensuring that the position remains सुरक्षित (safe) and balanced.
3. Functional Integration
The posture is a balance between flexibility and stability. While the hips provide the necessary range of motion, the core and spinal muscles maintain posture, and the knees and ankles adapt to the position. Proper coordination among these structures ensures that the pose is both effective and injury-free.
#Knee to the Floor: Lotus Pose in Banglore
What preparatory poses improve flexibility for Lotus Pose?
1. Foundational Hip Openers
- Baddha Konasana (Bound Angle Pose)
This pose gently opens the inner thighs and groin, improving hip flexibility. It also helps the knees move closer to the floor over time without forcing them. - Upavistha Konasana (Wide-Angle Seated Forward Bend)
Encourages deep hip abduction and stretches the hamstrings and inner thighs, creating more space in the hip joints.
2. External Hip Rotation Poses
- Eka Pada Rajakapotasana (Pigeon Pose)
One of the most effective poses for opening the outer hips and glutes. It directly prepares the hip rotation required for Lotus. - Agnistambhasana (Fire Log Pose)
Mimics the leg stacking of Lotus Pose, helping develop समान (balanced) hip rotation and control.
3. Progressive Lotus Preparations
- Ardha Padmasana (Half Lotus Pose)
A safer intermediate step that builds familiarity with placing one foot on the opposite thigh while keeping the other leg grounded. - Sukhasana (Easy Cross-Legged Pose)
While simple, it establishes proper seated alignment and धीरे-धीरे (gradually) improves hip openness with consistent practice.
4. Deep Hip and Glute Stretching
- Gomukhasana (Cow Face Pose – Legs)
Provides a deep stretch to the outer hips and gluteal muscles, improving flexibility needed for knee descent. - Ananda Balasana (Happy Baby Pose)
Gently opens the hips while supporting the lower back, making it a safe preparatory posture.
5. Spinal Alignment and Stability
- Vajrasana (Thunderbolt Pose)
Helps develop comfort in seated positions and encourages upright posture. - Marjariasana and Bitilasana (Cat-Cow Flow)
Improves spinal mobility and awareness, which supports proper alignment in Lotus Pose.
#Knee to the Floor: Lotus Pose in Hyderabad
What are the benefits and precautions of this practice?
Benefits
1. Deep Hip Flexibility
This variation enhances external rotation in the hips, improving overall joint mobility. Over time, it reduces stiffness in the glutes, piriformis, and आसपास (surrounding) hip muscles.
2. Improved Posture and Spinal Alignment
By encouraging an upright spine, the pose strengthens postural awareness. It helps counteract slouching and promotes a natural spinal curve, which is essential for बैठना (sitting) comfortably for long periods.
3. Ideal for Meditation and Breath Control
Padmasana is traditionally used for meditation and pranayama. The stable base allows for minimal शरीर (body) movement, enabling deeper focus, controlled breathing, and mental clarity.
4. Enhanced Joint Stability
When performed correctly, the pose strengthens the muscles supporting the hips and knees, contributing to better joint stability and balance.
5. Improved Circulation and Energy Flow
The seated position promotes better blood circulation in the lower body and is believed in traditional practices to support ऊर्जा (energy) flow, enhancing overall vitality.
6. Mental Calmness and Focus
The stillness of the posture, combined with steady breathing, helps reduce तनाव (stress) and supports a शांत (calm) mental state, making it valuable for mindfulness practices.
Precautions
1. Avoid Forcing the Knees
The most critical precaution is to never push the knees toward the floor. The movement must come from hip flexibility. Forcing the knees can lead to serious ligament injuries.
2. Not Suitable for Beginners Without Preparation
This is an advanced posture. Beginners should first develop पर्याप्त (sufficient) hip mobility through preparatory poses before attempting full Lotus.
3. Knee and Hip Injuries
Individuals with existing knee, hip, or ankle injuries should avoid this pose or practice only under professional guidance. Even mild discomfort should not be ignored.
4. Use of Props and Modifications
If the knees remain elevated, support them with cushions or practice Half Lotus instead. Elevating the hips can also reduce strain and improve alignment.
5. Maintain Proper Foot Placement
Feet should rest securely on the thighs near the hip crease. Incorrect placement can दबाव (pressure) the ankles or knees and lead to discomfort.
6. Gradual Progression is Essential
Flexibility takes time. Attempting to achieve the “knee to the floor” position too quickly increases the risk of injury. Consistent, mindful practice is key.
#Knee to the Floor: Lotus Pose in Ahemadabad
Case Study of Knee to the Floor: Lotus Pose.
Subject Profile
The subject was a 35-year-old yoga practitioner with an intermediate level of experience and a consistent practice history of approximately two years. The individual reported tight hips, mild discomfort in prolonged seated positions, and an inability to achieve full Padmasana with knees نزدیک (close) to the floor. No prior knee injuries were reported, but limited external hip rotation was observed.
Intervention Plan
A structured 10-week flexibility and alignment program was implemented, focusing on gradual progression toward Knee to the Floor in Lotus Pose. The routine consisted of five sessions per week, each lasting 35–45 minutes. Initial weeks emphasized foundational hip-opening poses such as Baddha Konasana, Pigeon Pose, and Fire Log Pose. Core stability and spinal alignment exercises were also included to support proper posture.
By week 4, the subject began incorporating Half Lotus (Ardha Padmasana) with attention to सुरक्षित (safe) foot placement and knee alignment. Props such as cushions were used to support elevated knees and maintain आरामदायक (comfortable) positioning. From week 7 onward, full Lotus Pose was introduced for short durations, focusing on relaxation and breath control rather than depth.
Observations and Progress
Over the course of the program, the subject demonstrated significant improvement in hip mobility and बाहरी (external) rotation. By week 8, both knees were able to descend closer to the floor without discomfort, indicating improved flexibility in the hip joints. The subject also reported reduced stiffness in the lower body and increased comfort during meditation sessions.
Postural assessment revealed enhanced spinal alignment, with the subject able to maintain an upright and stable torso for longer durations. The integration of breathing techniques further contributed to relaxation and बेहतर (better) body awareness.
Challenges and Adjustments
The primary challenge was initial tightness in the hip external rotators, which limited knee descent. This was addressed through consistent practice of preparatory poses and extended warm-up routines. Care was taken to ensure that no force was applied to the knees at any stage.
Occasional ankle discomfort was managed by adjusting foot placement and using мягкий (soft) support under the legs. Emphasis on gradual progression helped prevent strain and allowed the subject to adapt safely.
Outcomes
By the end of the program, the subject successfully achieved Knee to the Floor in Padmasana with proper alignment and no reported pain. Improvements were noted in flexibility, बैठना (sitting) comfort, and overall posture. The subject also reported enhanced focus during meditation and reduced physical distraction.
Conclusion
This case study demonstrates that Knee to the Floor in Lotus Pose can be safely achieved through a structured, progressive approach emphasizing hip mobility, alignment, and patience. The findings highlight the importance of avoiding force and prioritizing joint safety, particularly in the knees.
Further Reading
- Yoga Journal: https://www.yogajournal.com/poses/lotus-pose/
- Yoga International: https://yogainternational.com/article/view/lotus-pose
#Knee to the Floor: Lotus Pose in Kolkata
White Paper of Knee to the Floor: Lotus Pose.
Abstract
Knee to the Floor in Padmasana represents an advanced expression of seated yoga practice, emphasizing deep hip external rotation, स्थिर (stable) posture, and meditative stillness. This white paper examines the biomechanical principles, muscular involvement, physiological benefits, and risk considerations associated with this variation. The objective is to provide a structured, evidence-informed perspective for yoga practitioners, educators, and wellness professionals.
Introduction
Padmasana has long been regarded as a foundational posture for meditation and pranayama. The “knee to the floor” variation signifies an advanced level of flexibility and नियंत्रण (control), where the knees naturally descend toward the ground due to sufficient hip mobility. This posture is widely used in traditional and modern yoga systems as a benchmark for seated stability and alignment.
Biomechanical Analysis
The posture primarily involves the hip joints, which undergo flexion, abduction, and external rotation. These combined movements allow the thighs to rotate outward and the knees to descend. The knees function as hinge joints and should remain passive, receiving minimal rotational stress. Proper execution ensures that all movement originates from the hips, thereby protecting the knee ligaments.
The pelvis maintains a slight anterior tilt, supporting the natural curvature of the spine. The spine remains elongated and स्थिर, with minimal muscular effort required to sustain the position. The ankles are placed in a flexed position atop the thighs, requiring careful alignment to avoid compression.
Muscular Engagement
Key muscle groups include the hip external rotators (piriformis, gemelli, obturators), gluteal muscles for stabilization, and the adductors, which are lengthened during the posture. The core muscles, particularly the transverse abdominis, support spinal alignment, while the erector spinae maintain an upright torso.
Although the posture appears passive, subtle muscular engagement is required to maintain संतुलन (balance) and prevent collapse. Over time, increased flexibility reduces the need for active muscular effort.
Physiological and Functional Benefits
Regular practice of this variation enhances hip mobility and joint स्वास्थ्य (health), making it beneficial for individuals seeking improved flexibility. The upright posture supports efficient breathing patterns, allowing for deeper respiratory function. Additionally, the स्थिर (stable) seated position facilitates meditation by minimizing शरीर (body) movement and promoting मानसिक (mental) focus.
From a functional perspective, the posture improves बैठना (sitting) comfort and postural awareness, which are essential in both daily activities and long-duration seated practices.
Applications in Practice
Knee to the Floor in Padmasana is primarily used in advanced yoga practice, meditation, and pranayama sessions. It is also incorporated into teacher training programs as a model for teaching alignment and progression in seated poses. In therapeutic settings, modified versions may be used to gradually improve hip flexibility.
Risk Assessment and Precautions
Despite its benefits, the posture carries risks if performed incorrectly. The most common issue is knee strain caused by forcing the legs into position without adequate hip mobility. Practitioners with knee, hip, or ankle injuries should avoid this pose or practice only under professional supervision.
Gradual progression, proper warm-up, and the use of props are essential to reduce जोखिम (risk). Emphasis should always be placed on hip flexibility rather than achieving the visual form of knees touching the floor.
Conclusion
Knee to the Floor in Padmasana represents a synthesis of flexibility, stability, and mindfulness. When practiced with proper alignment and patience, it offers significant physical and mental benefits. However, its advanced nature requires a disciplined and सुरक्षित (safe) approach to ensure long-term sustainability.
Further Reading
- Yoga Journal: https://www.yogajournal.com/poses/lotus-pose/
- Yoga International: https://yogainternational.com/article/view/lotus-pose
#Knee to the Floor: Lotus Pose in Delhi
Industry Application of Knee to the Floor: Lotus Pose.
1. Corporate Wellness Industry
In corporate wellness programs, this posture is used in adapted forms to address issues caused by prolonged sitting, such as tight hips, lower back discomfort, and poor posture. While the full “knees-to-floor” expression is reserved for advanced practitioners, its preparatory versions are integrated into desk-based yoga routines. These adaptations improve बैठना (sitting) comfort, spinal alignment, and stress management among employees.
2. Physiotherapy and Rehabilitation Sector
In physiotherapy, the pose is utilized as a progressive hip-mobility assessment and conditioning tool. Therapists use graded exposure to external hip rotation patterns found in Padmasana to restore joint mobility and improve functional range of motion. It is particularly useful in non-weight-bearing rehabilitation programs where controlled hip opening is required without stressing the knees.
3. Fitness and Mobility Training Industry
Fitness trainers incorporate elements of this posture into mobility and flexibility programs. It is especially relevant in corrective exercise routines targeting restricted hips and limited lower-body mobility. The gradual progression toward knees approaching the floor is used as a benchmark for hip flexibility development and movement quality assessment.
4. Sports Performance and Athletic Conditioning
Athletes in disciplines requiring lower-body flexibility—such as martial arts, gymnastics, and dance—benefit from the hip-opening mechanics of this pose. It helps improve external rotation, reduce muscular stiffness, and enhance movement efficiency. Coaches often use preparatory versions to prevent overuse injuries and support recovery protocols.
5. Yoga Therapy and Mental Wellness
In yoga therapy, the posture is applied to support emotional regulation and mental focus. The grounded seated position promotes स्थिर (stability) and supports breath awareness practices. It is often used in therapeutic sequencing for stress reduction, anxiety management, and mindfulness training.
#Knee to the Floor: Lotus Pose in Mumbai
Ask FAQs
What is Knee to the Floor in Lotus Pose?
It is an advanced variation of Padmasana where the practitioner works toward allowing both knees to naturally descend toward the floor due to deep hip external rotation and proper alignment.
Is it normal if my knees don’t touch the floor?
Yes. Knee contact with the floor depends on individual hip mobility. In correct practice of Padmasana, knees should never be forced down. Progress happens gradually with consistent hip-opening practice.
What is the main requirement for this variation?
The primary requirement is strong hip flexibility, especially external rotation. The movement must come from the hips, not the knees, to avoid joint strain or injury.
Can beginners practice this pose?
Beginners should not attempt the full variation immediately. They should first practice preparatory poses and simpler seated postures before progressing toward full Padmasana with knees nearing the floor.
What should I avoid while practicing this pose?
Avoid forcing the knees downward, rounding the spine excessively, or placing the feet incorrectly on the thighs. These mistakes can lead to knee or hip discomfort and reduce the effectiveness of the posture.
Table of Contents
Disclaimer
Knee to the Floor in Padmasana is an advanced yoga posture that should be practiced gradually and with proper guidance. Do not force the knees toward the floor, as this may cause joint injury. Individuals with knee, hip, or ankle conditions should consult a qualified yoga instructor or healthcare professional before attempting this pose.